
So here it is, my very first tutorial to share with you. Very exciting.
Just before leaving for our LA and New York holiday, I knitted a lovely winter infinity scarf to take with me using a knitting loom. Amanda and I had had a much smaller version when we were children, and I was rather surprised to see that over 20 years later they are still around. Mine cost less than $10 from my local craft store, and there were several different shapes and sizes available.
I quickly discovered however that the instructions supplied with mine had a misprint. After some trial and error I eventually figured out the technique, and thought this tutorial might be useful to other ‘first time’ loom knitters.
I loved how quick and easy it was once I got the hang of it, and the pattern is really pretty – it’s actually reversible, rather than a knit effect on one side and a purl on the other.
NOTE: In this tutorial I have used two strands of yarn simultaneously, which results in a much thicker effect. If you decide to only use one thick strand of yarn, the method is exactly the same, the only difference is instead of four loops around each peg, yours will have two.
SUPPLIES
Rectangular knitting loom
Loom hook or crochet hook
Yarn (I used 2 balls 8 ply weighing 85g each for this project)
Scissors


Step 1 – Make a slip knot and place it around peg X, leaving approx 5 inches of yarn so you can weave it back through once finished. Then take the yarn across to peg 1.

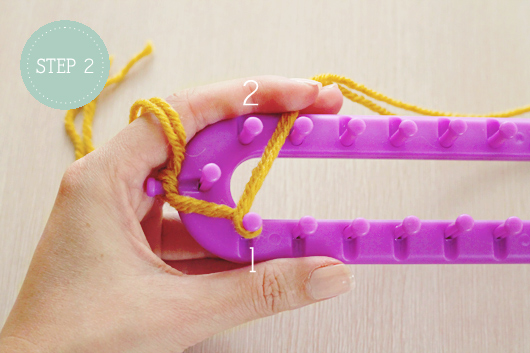
Step 2 – Wrap the yarn clockwise around peg 1 and take across to peg 2.
Step 3 – Wrap the yarn anti clockwise around peg 2 and take across to peg 3.
Continue wrapping each peg in the figure 8 pattern until you reach the desired width of your scarf. For mine I only wrapped 14 of the 18 available pegs.

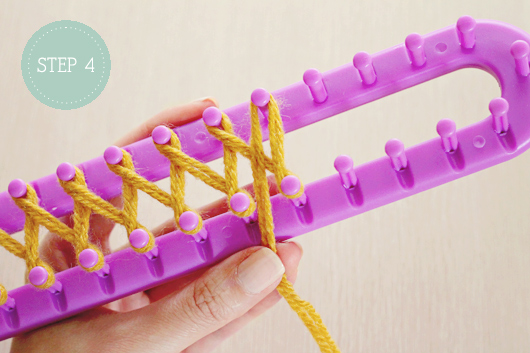
Step 4 – After wrapping the final even numbered peg, bring the yarn across to the second last odd number and hold.

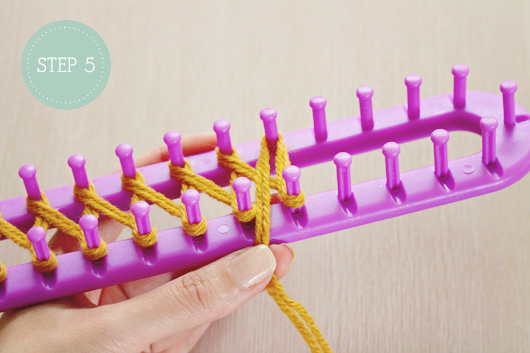
Step 5 – Push the yarn down on each wrapped peg so that the loops are at the base.

Step 6 – Wrap the yarn anti clockwise around the last odd numbered peg, creating a second loop of yarn around it. Now take across to the second last even numbered peg.
NOTE: The last even numbered peg will not have a second loop.

Step 7 – Wrap the yarn clockwise around the second last even numbered peg and take across to the second last odd numbered peg.
Continue wrapping each peg in the figure 8 pattern, working back towards the first peg.

Step 8 – After wrapping peg 1, take the yarn across between peg 2 and 4 and hold.

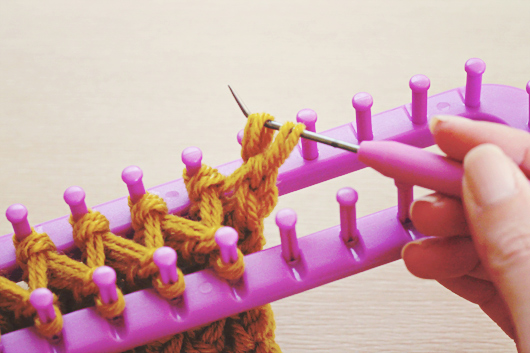
Step 9 – Using the loom hook (mine came with the loom) or a crochet hook, lift the bottom yarn loop over the top one, working down one side of pegs and then the other. The wrapping yarn will be in your left hand, ready to begin wrapping again from left to right.

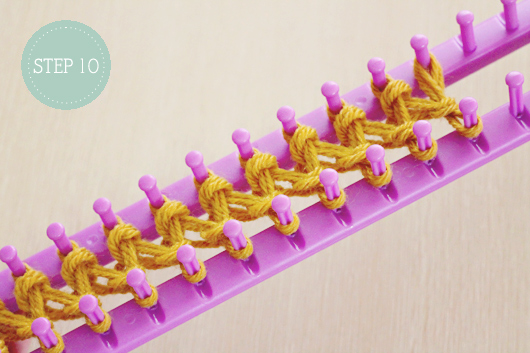
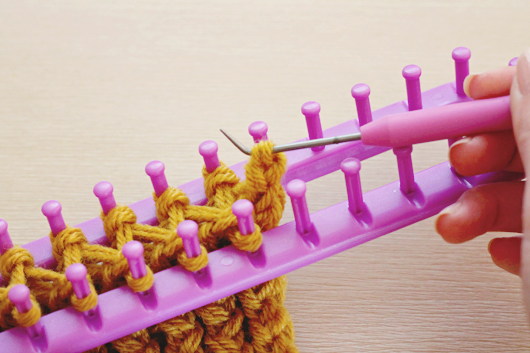
Step 10 – Push the yarn down again on each wrapped peg so the loops are at the base. This is your first row completed.
To continue the pattern simply repeat steps 3, 4, 9 and 10 to complete each row (when working from left to right as mentioned above in step 9). After a few rows you can undo the slip knot created in step 1.
To finish…
Once you have reached the desired length of your scarf (mine is approx 42 inches and a reasonably snug fit) and there is only one loop around each peg, cut the wrapping yarn off leaving a few inches. Using the loom hook (or crochet hook) start at the end opposite to the yarn tail and lift the loop off the odd numbered peg onto the crochet hook. Go to the even numbered peg and lift that loop off onto the loom hook as well.

There will now be two yarn loops on the loom hook.

Pull the first loop (closest to your hand) over the second loop.
Repeat this all the way down the loom until you reach the end. Pull the wrapping yarn through the last loop with the loom hook, pull snugly and weave the remaining yarn into the finished project. Now join the two ends with a flat seam using the same coloured yarn.
To wear, I give mine a quick twist before slipping over my head for a cozy, snug fit.
Enjoy!

FLAT SEAM HOW TO:
